SIDEBAR
»
S
I
D
E
B
A
R
«
Saturday, January 24, 2021: Beef Bourguignon with Noodles
Jan 25th, 2021 by Max

Welcome to kidscookdinner.com — a website my sister Alex and I (Max) started 5 years ago to talk about cooking, food, and world hunger.  To learn more about how this started, and the hunger charities we support, scroll down a bit.  Otherwise, to see what we’re cooking for dinner today…stay right here.

Today was a typical January day:  cold and very windy.  The whole family wanted something warm and hearty.  I looked online and found a recipe for Beef Bourguignon with noodles that looked good (it had bacon in it so how could it be bad?).  I went to Trader Joe’s and found all the ingredients except pearl onions.  I wish we could have found them but I substituted a cup of chopped onions instead. This recipe, sort of based on one found at myrecipes.com (found here) calls for a fair bit of prep but there is nothing difficult about it.

Here are the ingredients (except for the bacon, which I unbelievably forgot to put in the photo):

20210123_112418

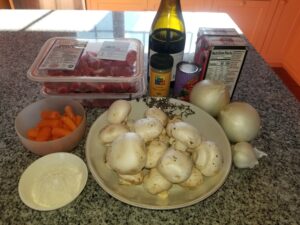
And here’s the exact amounts you need:

  • 2 to 2.5 pounds of beef stew meat
  • 4 slices of bacon halved
  • 1.5 pounds halved mushrooms (or quartered if mushrooms are large)
  • 1 cup carrots sliced 1/4 inch thick
  • 1 cup chopped onion
  • 4 cloves of garlic, minced
  • 1.5 cups dry red wine
  • 14 oz. beef broth
  • 16 oz. frozen pearl onions (or 1 cup rough chopped white onion)
  • 2 tablespoons olive oil (total)
  • 2 tablespoons tomato paste
  • 2 bay leaves
  • 2 teaspoons chopped FRESH thyme
  • 1/3 cup flour
  • 2 teaspoons salt (total)
  • 3/4 teaspoons black pepper (total)
  • 16 oz wide egg noodles

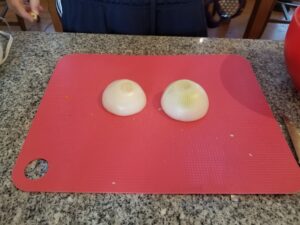
The first step is to prep all the ingredients.  That means chopping the onions and carrots, mincing the garlic, washing and quartering the mushrooms, and cutting up the beef chunks if too big.  My parents got me an onion chopper for Christmas which was supposed to make chopping onions easier.  (Chopping onions is my least favorite part of cooking.) Y0u are just supposed to have to cut the onion in half and then push the cutter down on top of it.  Unfortunately, it didn’t work.  It took all my strength to push the chopper down on the half onion and then I still had to pull out each piece of the onion from the chopper.  It was more work than just using a knife!

20210123_120720    20210123_120724  20210123_120736

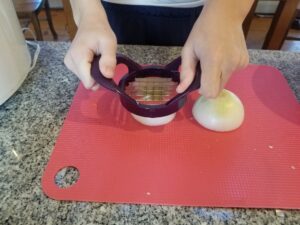
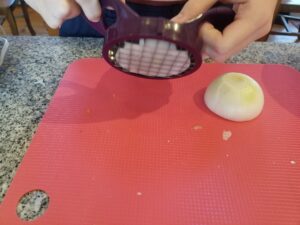
Even when I tried chopping just a SLICE of onion (versus the half onion), I had to pull the chopped onion through the other side.  Definitely do not buy this gadget.

20210123_130302   20210123_130310   20210123_120850

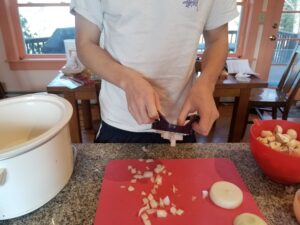
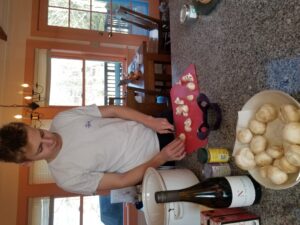
OK, enough about onions.  Chef’s tip, when chopping up mushrooms, remember they cook down a lot but if they are large (more than 1-1/2 inch diameter), cut into quarters not halves for this dish.  The idea is that this is a stew that you should be able to eat with a spoon, no knife needed.  Similarly, cut up the chunks of beef to be bite-size.

20210123_115348   20210123_115352

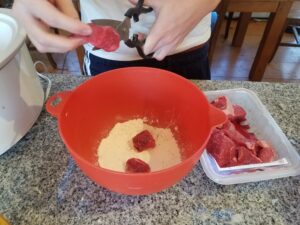
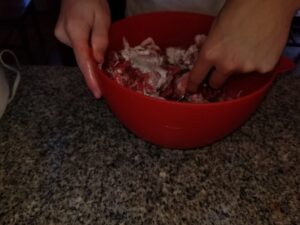
After everything is chopped, combine the flour with 1 teaspoon of salt and 1/4 teaspoon of pepper in a large bowl.  Add the stew meat and toss until the meat is coated lightly with the flour mix.

20210123_121356   20210123_121523  20210123_122211

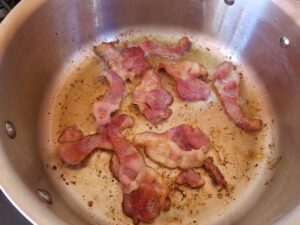
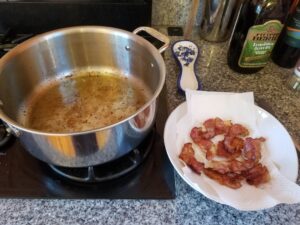
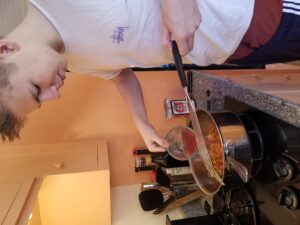
Then cook the bacon in a large saucepan on medium heat.  When it’s crisp, remove it from the pan but leave the bacon drippings in the pan.

20210123_120438  20210123_120557  20210123_120553

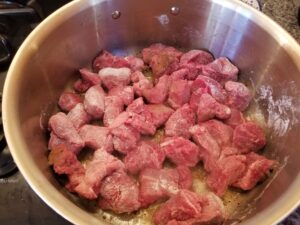
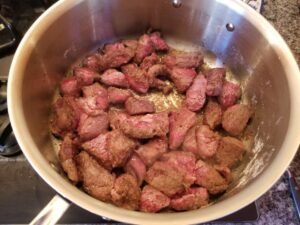
Add 1 tablespoon olive oil to the bacon drippings and then add the beef stew meat.  Brown on all sides.  (You may need to do this in batches, don’t overcrowd the pan).

20210123_122610   20210123_123005

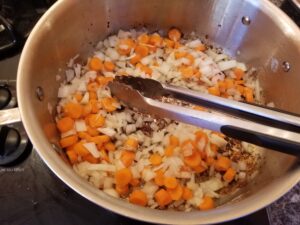
Put the browned beef into the slow cooker, add the second tablespoon of olive oil to the saucepan, and then add the chopped onions, sliced carrots, and minced garlic.  Saute for 5 minutes.

20210123_123755(0)

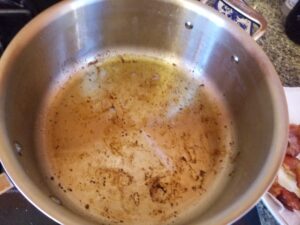
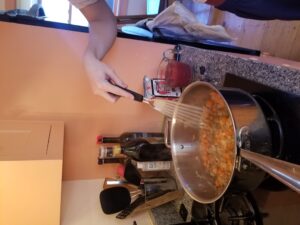
Then stir in red wine and 1/2 of the broth.  Scrape the pan to loosen all the browned bits stuck to the pan. And the remaining 1 teaspoon salt, 1/2 teaspoon pepper, chopped thyme, and tomato paste and bring to a boil.  Pour over the beef chunks in the slow cooker.

20210123_124445   20210123_124607  20210123_124723

Add the remaining beef broth to the saucepan to get all the browned bits out of the pan.   Chop up the bacon a bit more (again, think bite-size bits).  Then add the mushrooms, pearl onions (if you have them, if not the roughly chopped cup of onions), and chopped bacon to the slow cooker. Then pour the remaining beef broth (with the last browned bits from the saucepan) over the mix in the slow cooker.

20210123_124923

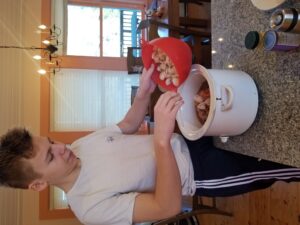
Here’s the “before the broth” picture:

20210123_125410

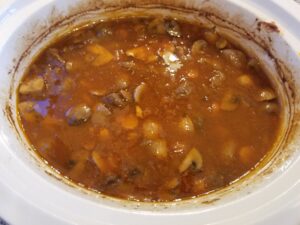
Cook on high for 3 hours (or low for 6): here’s what it looked like the half-way through.  (I gave it a good stir here to make sure the meat and mushrooms on top got cooked)

20210123_125832

After 3 hours (high) or 6 hours (low), turn off the heat and let it sit.  If you have time refrigerate overnight: the flavor will be better and it’s easier to remove extra fat.  We were too hungry to wait 24 hours, but I did let it cool in the fridge for two hours, then removed the extra fat.

20210123_163526

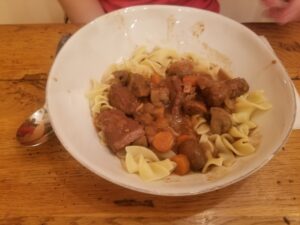
For dinner, I prepared wide egg noodles and served the Beef Bourgignon on top.

20210123_194859  20210123_195348

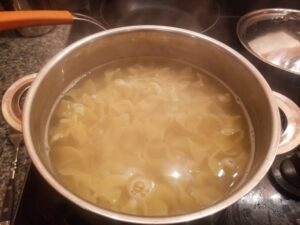
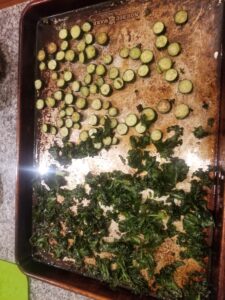
(While the water was boiling for the noodles, I roasted some leftover kale and baby zucchini for snacks. We were all getting hungry!)

20210123_190808

It was delicious (and frankly, even better for lunch the next day)

20210123_195354


January 10, 2021: Sunday Dinner: Sheet-Pan Salmon and Broccoli with Brown Rice
Jan 15th, 2021 by Max

Welcome to kidscookdinner.com, a website I (Max) started with my sister (Alex) 5 years ago to document our cooking adventures, encourage kids to cook more (and not just re-heat junk in the microwave) and make people aware of the huge issue of world hunger.  To learn more about why we started the site, and the hunger-relief charities we support, scroll down a bit. Otherwise to learn what we cooked this week, stay right here.

Tonight I wanted to cook something healthy…it’s the New Year and with COVID surging, I thought that our family should focus on “good” food.  Since Covid, The New York Times has had a weekly section called At Home that suggests a variety of coping mechanisms, lock-down survival recommendations, and delicious recipes.  One of those was for Sheet-Pan Salmon Broccoli with Sesame and Ginger, and I decided to try it out, along with some brown rice. Here’s my final plate.

20210110_191702

There are a lot of ingredients but everything cooks on one sheet so it was a surprisingly simple recipe.

20210110_181405

Here’s what you need to have on hand:

  • 4 Tbs. toasted sesame oil
  • 2 Tbs. soy sauce
  • 1 Tbs. rice vinegar
  • 1 Tbs. honey
  • 1 Tbs. finely chopped fresh ginger
  • 1 garlic clove, finely chopped
  • 1 pound broccoli florets
  • 3 scallions: 2 of which should be peeled and cut into 1-1/2 inch segments and the other finely chopped for garnish
  • 1 Tbs. olive oil
  • 4 Six ounce skin-on salmon filets, or as we did 6 Four ounce filets
  • 1 Tbs. Sesame seeds (optional, for garnish)

The first step was to pre-heat the oven to 400 degrees (the NYT recipe says 425 degrees but I am always worried about overcooking fish so I lowered the pre-heat temperature to 400 degrees). Meanwhile, while the oven is heating, I rinsed 2 cups of brown rice and started the rice in our rice cooker.  I’m not sure why but whenever we rinse rice until the water runs clear, it is much fluffier. But if you don’t have time…just cook it.

20210110_181710

I also peeled and chopped the ginger and garlic.

20210110_182603  20210110_183517  20210110_183305

Once everything was prepped for the salmon glaze, I whisked  3 tablespoons of the sesame oil with the soy sauce, rice vinegar, honey, ginger, and garlic ingredients until smooth, and set aside.

20210110_183643   20210110_183853   20210110_184505

Then I chopped the scallions into 1-1/2 inch segments and tossed with the broccoli and the remaining tablespoon of sesame oil, along with the olive oil and salt and pepper, and put in the oven to roast for 10 minutes.  (NYT says 5 minutes, but that’s not enough time, the broccoli just won’t be cooked enough.)   Once the broccoli and scallions were in the oven, I chopped the remaining scallion into small slices for garnish.

20210110_184129  20210110_184416

After 10 minutes, it was time to add the salmon to the sheet pan. Salt and pepper the fillets, brush with glaze, and then position them in the center of the sheet pan.

20210110_185314  20210110_185509

Here’s the beauty shot of the sheet pan going into the oven:

20210110_185512

And here’s the shot of the pan coming out of the oven:

(And here’s our dog Koko chasing her tail because she thinks she might get some salmon leftovers…she loves salmon.)

20210110_183645

Ultimately, we plated the dinner and it was both delicious and healthy (and we did give Koko some salmon). Here’s to a happier and healthier 2021!

20210110_191732


January 2, 2021: New Year’s Train Cake
Jan 9th, 2021 by Alex

Happy New Year and welcome to kidscookdinner.com, a website my brother Max and I (Alex) started 5 years ago to post about food, kids’ cooking, and the serious issue of hunger in the world.  Unfortunately, the need for hunger relief has only gotten worse since then, so if you have time, check out Action Against Hunger’s website here.  To see what we cooked today, read on.  As I mentioned a couple of days ago, Max is pretty busy with his college applications so I have been doing most of the holiday baking.

One of our annual traditions is a holiday train cake.  The end result is cute and delicious but this does take all day to make.  Here’s a teaser photo of the end result.

20210101_151331

Here are the ingredients: the most interesting one is sour cream.  I was very skeptical about including it, but it made the cake very light and fluffy.

20201231_134018

Recipe:

  • 2-1/4 cups all-purpose flour
  • 1-3/4 cups sugar
  • 2 tsp. baking powder
  • 3/4 tsp. baking soda
  • 1 tsp. salt
  • 2 sticks unsalted butter, melted
  • 1 cup sour cream
  • 4 eggs
  • 1 Tbs. vanilla extract

The other key element is a train cake mold.  Mom got our mold from Williams & Sonoma maybe 8 years ago: it’s really cute with 9 cars, including an engine, coal car, and caboose.  When we were younger, we pretended it was the Polar Express.  The recipe is from W&S as well.

20201231_133622   20201231_133613

The first step is to preheat the oven and grease and flour the cake pan (this is tricky because there is so much detail, but super important, otherwise you will lose those details when you flip the cake out.  The second step is to sift together the flour, baking powder, baking soda, and salt and, in a separate bowl, whisk together the butter, sour cream, 4 eggs, and vanilla.

20201231_135951

Then with an electric beater (using flat beater if you have it), gradually add the dry ingredients to the butter mixture and beat on low till the dry stuff is just moistened.

20201231_140455

Scrape down the bowl and increase speed to medium for 30 seconds.  Make sure everything is combined but don’t overbeat.

20201231_140806  20201231_140757

Then per the W&S recipe you are supposed to divide the batter in half and set half of it aside.  (Then after you’ve cooked the first half of the batter, and the mold has cooled and been cleaned and greased and floured, you cook the second half of the batter.  From prior experience, we know that 9 cars are a lot of train cars to decorate so we decided to make cupcakes instead of 9 more cake cars.) Anyway, once the batter is complete, you spread it evenly in each car mold and bake 18-22 minutes (until a toothpick comes out clean).

20201231_141316

Do not, do not fill the molds all the way up as we did. The recipe says to spread the batter so it reaches the top edges of each mold with the batter a little lower in the center of the mold….that is what we tried to do (see photo below) but this is still too much batter.  We found out the hard way.

20201231_142557

As you can see, this resulted in overflowing cake cars.

20201231_145515

Fortunately, I was able to slice off the extra cake with a large bread knife (which left us with good snacks while we waited for the cake to cool).  You should let the cake cool for 10 minutes on a wire rack and then invert and let cool for at least an hour before frosting.

20201231_150634   20201231_151538

When I finally flipped the pan, I was delighted.

20201231_151600

Once the cakes were cooled, I mixed up red, green, and white frosting and got out holiday sprinkles and M&Ms. The M&M are ideal for the train wheels.

20201231_171948

Then it was frosting time.

20201231_183559  20210101_151427

And here’s the final, full train cake — it tasted great.

20201231_204051

PS: the cupcakes turned out nicely as well and were a little easier to decorate. 🙂

.20201231_145523   20201231_195218


»  Substance:WordPress   »  Style:Ahren Ahimsa